Windows
10 has set Windows updates automatically. But sometimes Win10 updates
actually feel very annoying to users. In addition to wasteful quota (for
users with limited internet quota), the Windows Updater process that
runs, can slow down the performance of your Windows 10.
How To Permanently Turn Off Windows 10 Update?
There
are 3 steps that must be done to permanently turn off Windows10 Update.
A & B step to disable the updater, and step C to redirect the
update link to the Windows server. step C is actually just in case the
updater is active again without knowing why, or if someone activates it
without our knowledge.
A. Via Command Prompt.
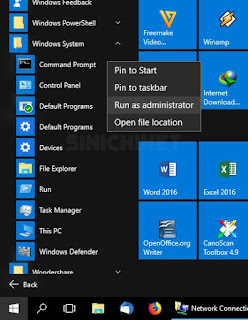
1. Follow the following navigation: Start/All Apps/Windows System/Command Prompt.
2. Right-click on the Command Prompt and select Run as administrator.
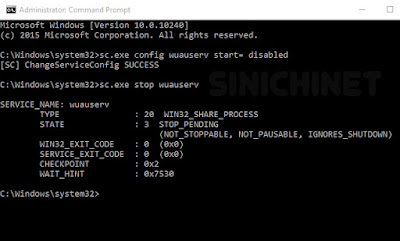
3. At the Command Prompt, type the following 2 commands:
sc.exe config wuauserv start= disabled
sc.exe stop wuauserv
If the response that comes out in the Command Prompt matches the image below, then step 1 has succeeded, and please proceed to the next step.
B. Through Services (services.msc). This second step is to help complete the process in the first step.
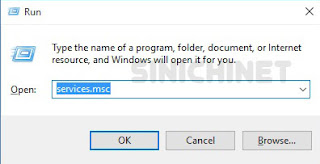
1. Press Ctrl + R or through Start - Run to open Run Command.
2. Type services.msc to run the Services feature.
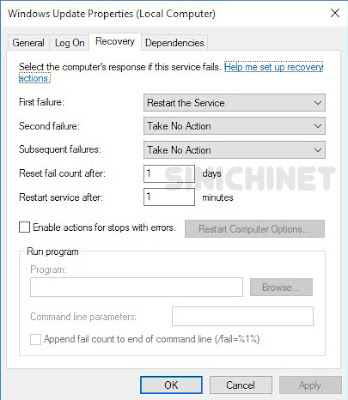
3. In the right column select the Windows Updates option, and click 2x so that the Windows Update Properties (Local Computer) window appears.
4. Select the Recovery tab. In First failure, change the Restart the Service option to Take No Action. Click the Apply and OK button.
C. Through Registry Editor (regedit). Actually the 2 steps above are enough, but step 3 is better to be done just in case.
1. Press Ctrl+R or through Start - Run to open Run Command.
2. Type regedit to run the Registry Editor.
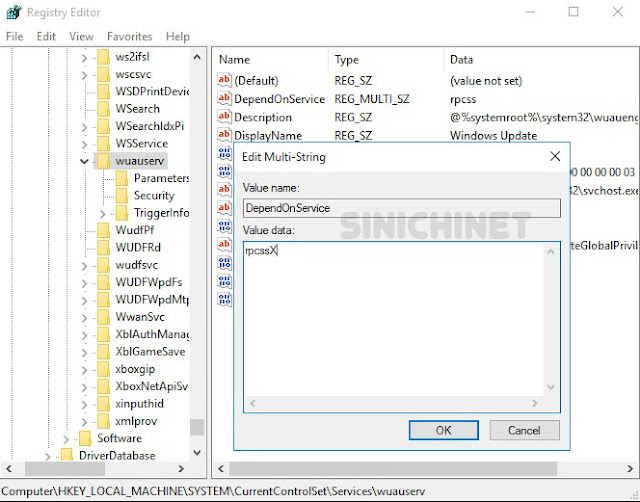
3. Follow the following navigation: HKEY_LOCAL_MACHINE\SYSTEM\CurrentControlSet\Services\wuauserv
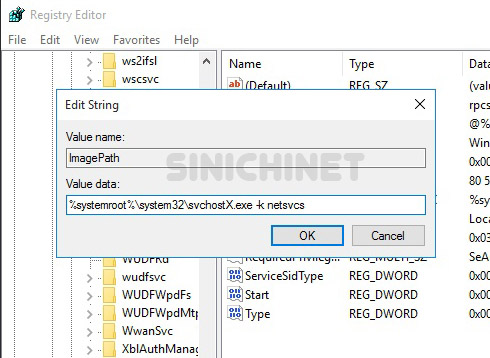
4. We will modify the data in DependOnService and ImagePath.
- DependOnService : rpcss changed to rpcssX
- ImagePath : %systemroot%\system32\svchost.exe -k netsvcs changed to %systemroot%\system32\svchostX.exe -k netsvcs
Well, that's the tutorial How to Permanently Turn Off Windows10 Update. Hopefully it can be useful for you.